Restoring nVidia 3D Vision on Windows 10

nVidia ended support for the 3D Vision system on April 11, 2019. I didn’t learn this until I updated to a newer driver today, which then sent me on a long journey trying to figure out how to install a driver newer than I had before but old enough to still have 3D Vision support.

According to the release notes of recent nVidia drivers, “those looking to utilize 3D Vision can remain on a Release 418 driver,” but the 418 driver is not available through nVidia’s driver search tool.

You can still obtain version 418 from guru3d.com, along with a tool you may need to wipe any newer versions of the driver from your system:

Windows 10 may automatically update the driver next time it checks for updates. To prevent it from doing this use the “show or hide update” troubleshooter:

Oatmeal banana pancakes

Out of flour? Want gluten-free pancakes? Want to change things up? A few simple modifications to a banana bread recipe will get you wheat-free pancakes.

In a blender, combine:

  • 3 eggs
  • 1/2 cup water
  • 2 bananas
  • 3 tsp baking powder
  • 1 tsp baking soda
  • 114g melted butter OR 100g olive oil
  • 100g sugar OR 100g honey
  • 1 tsp vanilla extract

Once this is thoroughly blended, add (a little bit at a time) 260g oats and continue to blend until oats are completely pulverized in the liquid. It will take a few minutes.

Bread machine baguette

Baguettes are a wonderful thing, but making a proper baguette requires multiple touch-points over an extended length of time. It’s not difficult by any means, just time intensive.

Since I own a bread machine I thought there must be a way to automate the dough. However the Internet does not appear to have (yet!) any recipes for that:

  • Have sufficient rise time. In order to develop the yeast for a baguette you need to let the dough work for a minimum of 9 hours.
  • Utilize a poolish. This is key to developing the yeast.
  • Bake at the right temperature. This type of bread needs to be baked at 470°F, which you can’t do in a bread maker, so you need to remove the dough before the bake cycle and finish it in the oven.
  • Use the right ingredients. A baguette is made from only flour, water, salt (2% by weight), and yeast (only a pinch).

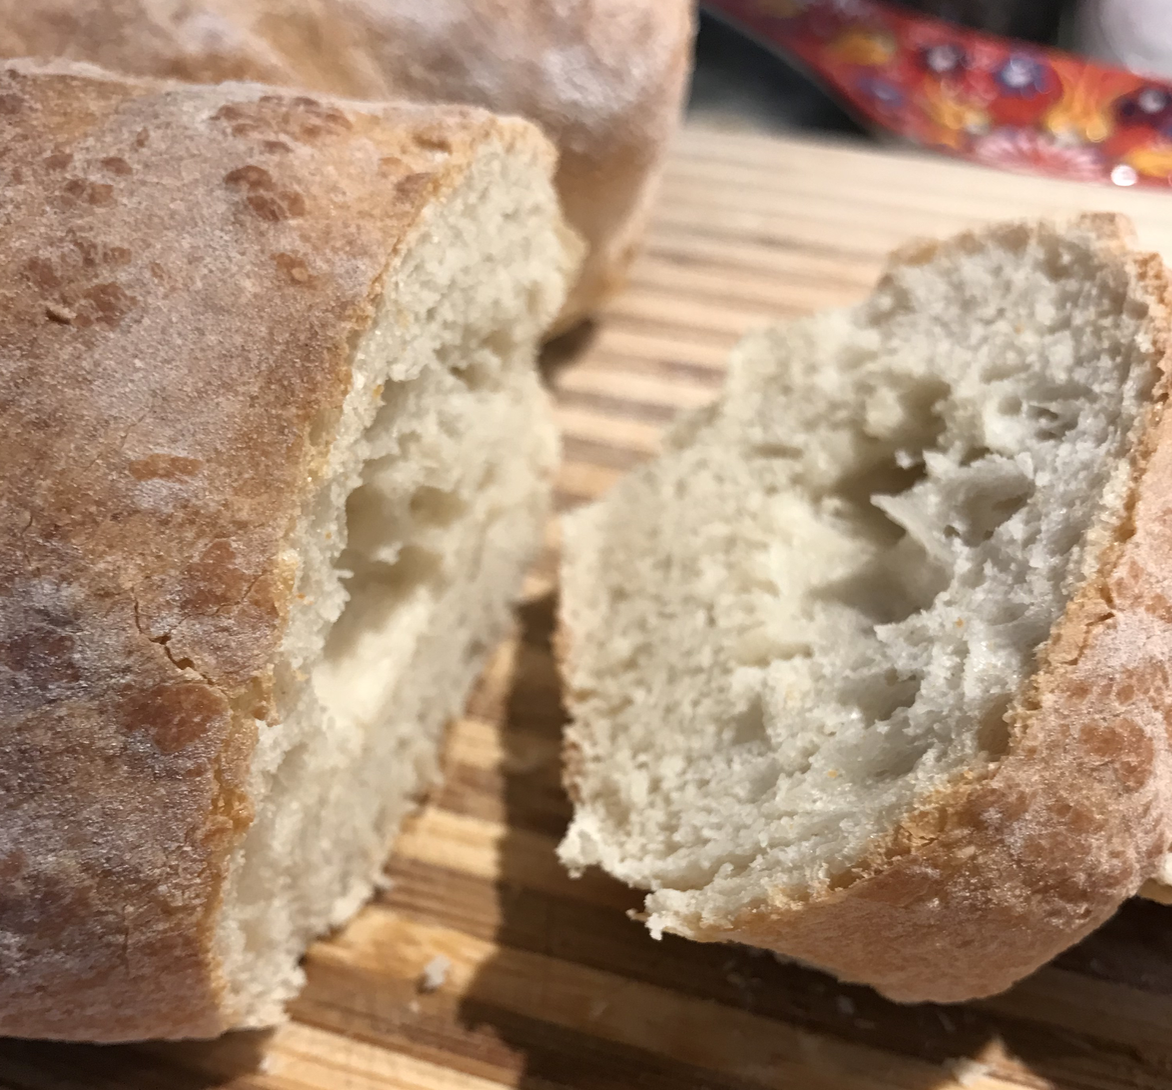
I set our to change this. After some experimentation I discovered a very quick and easy way to make an excellent baguette at home with very little effort utilizing a Zojirushi BB-PAC20BA in “HOME MADE” mode. The first “trick” is to assemble the dry ingredients on the bottom of the bread maker (the opposite of what you would normally do).

Place in the bread maker, in this order:

  • A pinch of yeast on one side
  • 1 tsp (10g) salt on the opposite side
  • 300g bread flour*

Mix a poolish by combining:

  • A pinch of yeast
  • 1 and 1/4 cup water
  • 180g bread flour*

Carefully pour the poolish over the dry ingredients, being careful to not to mix them.

Program the bread machine (on my Zojirushi this is done in “HOME MADE” mode):

  • 0 minutes rest
  • 20 minutes knead
  • 60 minutes rise 1
  • 60 minutes rise 2
  • 60 minutes rise 3
  • 0 minutes bake
  • 0 minutes keep warm

The second “trick” is to execute this custom program on a timer. Set the bread machine to finish in 9 hours*. This will allow the poolish to develop for 6 hours, and the dough to rise over another 3 hours. Go to sleep, or get on with your day!

When the cycle is complete, pull the dough out onto a floured surface, divide in half and roll into two loaves. Bake at 470°F for about 10-12 minutes. For a crispy, crackly exterior, throw about a half cup of water into the bottom of the oven in the final minutes–the steam will crisp up bread.

*I’ve tried this recipe with several flours, and I prefer it with Gold Medal Bread Flour. For King Arthur Bread Flour (which has higher protein content ) increase the water to 1 3/8 cups and allow at least 11 hours total time.

Three things I’ve come to believe about post modern C++

In no particular order:

  • Template metaprogramming is still evil, and C++11/14 hasn’t fixed anything about it. People argue metaprogramming enables “clean, elegant code,” as if a home built on a garbage dump won’t smell like garbage. If anyone else needs to repair or extend the foundation of your home they’ll need to parse through your garbage pile to make changes. Template metaprogramming as a rule should simply never be done outside low-level libraries.
  • auto is too easy to abuse. Oh but, “the IDE makes auto easier to read!” Go back to Java. auto does have a few good uses, clang-tidy provides excellent guidance on where its effective, its guidance should be followed.
  • Large lambdas harm readability. They make the control flow of the program harder to parse and discourage self documenting code. Lambdas should be limited to 2-3 statements. And please, if you write a lambda, mean it: don’t write a lambda where you could have just as easily written a standalone function.

The simplest BBQ brisket recipe on the Internet

I recently got a new BBQ smoker, after a 10+ year hiatus from BBQ. Temperature controlled, pellet fed.

I had to try a brisket first. But since I was rusty at smoking meats, I read a few articles online about making the “ultimate brisket” and was a little surprised by what I found. In summary, there are a lot of recipes out there that will keep you busy by your smoker rubbing, basting, spraying, turning and poking for 16+ hours. It sounded like a lot of work, and much of it sounded unnecessary.
Humans have been smoking meat for thousands of years. The recipe has always been salt+smoke. How hard can this be? After a few texts and calls to a good friend and avid barbecuer, I decided to try something simpler. Much simpler. For science.
The results turned out great. Not <your favorite BBQ joint> great, but pretty darn great given I put basically zero effort into this.
BBQ people of the Internet, I present the world’s simplest BBQ brisket recipe.
  1. Pat dry your brisket.
  2. Trim some fat off, but leave at least 1/4″ fat where you can. The fat makes a good moisture insulator. Or don’t. A dry crust tastes great too! For this experiment I trimmed the fat off one half of mine and left the fat on the other half; I liked both!
  3. Make a dry rub of 2 parts rock salt to about 1 part ground black pepper. Eyeball it. Rub it into the meat and let the brisket sit out for an hour.
  4. Set your smoker to 150°F and wait for it to stabilize at 150.
  5. Place the brisket in the smoker and cook for at least 1 hour per pound.
  6. DO NOT OPEN YOUR SMOKER. “If you’re looking, you’re not cooking.” Go look at something else: Look up at the sky, your significant other, whatever. There’s plenty of interesting things to look at. Don’t risk fiddling with the internal temp of your smoker.
  7. Shut the smoker off, wrap in foil and let rest for 60+ minutes before serving.
That’s it! Brisket, salt, pepper, smoke.. This is not complicated. My brisket came out with a perfect bark, a 3/8″ smoke ring and was oozing liquid when I cut into it. Tasted amazing. I noted that the internal temp of the fat side was 154°F, so my smoker–even though it was set to 150–was overshooting a little.
If you want the “ultimate brisket” keep scouring the Internet, but you should try this first 🙂
Update (a few weeks later): I’ve cooked about 4 more briskets since writing this and have learned a bit more about how to achieve the “ultimate brisket”. 160°F is the temperature at which the connective tissue collagen begins to break down (Link). If you want falls-apart-under-a-plastic-fork-tender brisket, you need to get the brisket above this temperature. The problem is this higher temp also comes with higher moisture loss.

The solution is a trick called the “Texas Crutch”: after slow-smoking the brisket at 150°F for 10+ hours, tightly wrap it in foil and then throw it in the oven at 175°F and let it go for another 6+ hours. You’ll lose the crispy bark but the trade is a super-moist melt-in-your-mouth brisket.

This isn’t quite as simple as I initially advertised but it’s worth the effort. I’ve been doing this as an 16 hour recipe: Start smoking at 8PM, at 8AM wrap it in foil and stick it in the oven and you’ve got great BBQ for lunch. The same technique works great with chicken legs. For pork butt, instead of wrapping in foil, stick it in a dutch oven and it’s ready to pull right away!
Ultimate omelet

MASTERS OF BREAKFAST: Episode 1

The trick to the perfect omelet is to borrow a technique from frittatas: broil the omelet under high heat before you flip it. Broiling causes the egg to rapidly expand, yielding a fluffier, moister omelet. And it has the added benefit of decreasing the overall cook time.
Since we’re placing the omelet pan in an oven under a 500°F broiler, you’ll want to use a carbon steel or cast iron pan for this recipe. A 9″ pan with a 45° edge is ideal if you plan to flip the omelet like a pro.
  1. Pre-heat your broiler to 500°F.
  2. Pre-heat your omelet pan to about 275°F (medium).
  3. Sauté your diced veggies (onion, bell pepper, etc.) in a little oil until desired texture. (If you’re making a batch of omelets you may want to do this ahead of time).
  4. Add your meats (bacon, ham, sausage, etc.) and sauté for another minute. Shake pan to make sure nothing is sticking–if its sticking add a little more oil.
  5. Whip 2 eggs with a splash of water until frothy and pour over sautéd meats and veggies.
  6. Cook for one minute on stove (should be bubbling very slowly).
  7. Move pan to oven and place under broiler for 1-2 minutes.
  8. Watch omelet carefully, remove from oven when sides begin to curl up and top is a very light golden brown.
  9. Flip omelet over and place pan back on hob.
  10. Add shredded cheese to one side of omelet and fold omelet over. Cook for another 30 seconds.
  11. Flip folded omelet again and place back on hob for another 30 seconds.
  12. Serve.
IMG_0068.JPG

Creating lesson files for Yamaha YPG-235

I recently picked up a YPG-235 off Craigslist. One of the reasons I sought it out was for the “lesson mode” (or “Yamaha Education Suite”) where it helps you learn songs by displaying the notes and pausing the song for you until you hit the notes. You can do the same with a PC/iPad now, but I was hoping for a more offline experience. Sadly, the process to get new songs onto the keyboard is less-than-straightforward.. As I was unable to find a tutorial online on how to do this, here are the basic steps for you, Internet.

You’ll need a PC running Windows, as Yamaha’s music transfer software only runs on Windows. Install the USB MIDI driver for your keyboard and verify you can transfer midi files to it using their “Musicsoft Downloader” program.
Regular midi files will play on Yamaha keyboards, but they won’t work in lesson mode. The trick for getting files to play in lesson mode is to put the music you want to play yourself on Track 0 with the right hand on Channel 0 and the left hand on Channel 1. The file must also be in MIDI Type 0 file format.
Some free software for Windows that can help you out with a conversion: try MidiEditor to rearrange the tracks/channels and GN1:0 to convert MIDI Type 1 format files into MIDI Type 0.
Once you have the file in the right format you should be able to transfer it to the keyboard, reboot and it will appear in the song list and be playable in lesson mode. If you’re looking for free midi files try midiworld.com or hymnary.org. Good luck!

Displaying a sequence of images in iPython Notebooks

You can rip a sequence of images into an mp4 and display it inline in an ipython notebook using a function like this:

import matplotlib.pyplot as plt
from matplotlib import animation
from IPython.display import display, HTML
def plot_movie_mp4(image_array):
dpi = 72.0
xpixels, ypixels = image_array[0].shape[0], image_array[0].shape[1]
fig = plt.figure(figsize=(ypixels/dpi, xpixels/dpi), dpi=dpi)
im = plt.figimage(image_array[0])
def animate(i):
im.set_array(image_array[i])
return (im,)
anim = animation.FuncAnimation(fig, animate, frames=len(image_array))
display(HTML(anim.to_html5_video()))

However there’s a disadvantage with this method: You have no control over the encoding settings so you’re likely to get a video with a lot of artifacts.

If you would like a video without artifacts, check out JSAnimation. This sends the sequence of images to the browser along with some javascript to play through them. This looks much better and is much easier to control than an html5 video control:

from JSAnimation import IPython_display
def plot_movie_js(image_array):
dpi = 72.0
xpixels, ypixels = image_array[0].shape[0], image_array[0].shape[1]
fig = plt.figure(figsize=(ypixels/dpi, xpixels/dpi), dpi=dpi)
im = plt.figimage(image_array[0])
def animate(i):
im.set_array(image_array[i])
return (im,)
anim = animation.FuncAnimation(fig, animate, frames=len(image_array))
display(IPython_display.display_animation(anim))

Compiling OpenCV 3.1 on Ubuntu 16.04

16.04 uses gcc 5.4 by default. You’ll need to install gcc 4.9 and configure OpenCV to use 4.9 instead:

sudo apt-get install g++-4.9
cmake -DCMAKE_C_COMPILER=/usr/bin/gcc-4.9 -DCMAKE_CXX_COMPILER=/usr/bin/g++-4.9 .

If you have CUDA installed you may want to disable compiling the CUDA libraries as well, or else suffer another hour+ of compilation time. Add -DWITH_CUDA=OFF to disable CUDA.

Cheater chashu ramen

I’ve been on a quest this last year to find a home ramen recipe that’s easy, fast, and tastes somewhat authentic. So far my conclusion is such a thing doesn’t exist! Really good chashu takes 12+ hours (and requires a cut of pork belly–not always easy to find) and a rich broth takes 12-24+ hours. You can speed the process with a pressure cooker but it needs to be carefully monitored and thus loses on the easy criteria.

But I continue to keep trying. Here’s a technique that I think is worth sharing: This hardly tastes authentic at all but it’s relatively fast and very simple. I’ve made ramen this way a few times and it’s always been a big hit with the family. The trick is using a regular pork loin or pork chops (which we usually have in the freezer) in a slow cooker. Cooking time is 8-10 hours with about 15 minutes of prep time in the morning and another 30 minutes of activity towards the end before you serve it.
Ingredients:
  • 1.5-2 lb pork loin (cut into 1″ sections) or pork chops
  • 1 cup soy sauce
  • 1″ fresh ginger, sliced
  • 5-10 cloves fresh garlic
  • 1/2 lb fresh mushrooms
  • 1 lb baby bok choy
  • 2 things of dry ramen noodles
Place the pork, ginger and garlic in a small slow cooker and cover with 1 cup soy sauce and ~1 cup water, set on low. Cook for 8+ hours.
Pull the pork out of the slow cooker and cut into thin slices (or just separate it like pulled pork if you don’t care about the texture).
Take the broth from the slow cooker and pour into a large pot. Dilute the broth with 1-2 cups water (to taste), add the mushrooms and bring to a boil. Reduce heat to low, add the baby bok choy and simmer for 30+ minutes.
15 minutes before service, bring another pot of water to a boil and cook the ramen noodles. Drain and rinse.
Serve the pork, noodles and broth together in a bowl. Enjoy!
** What about the soft-boiled egg?? You can prepare eggs anytime and have them ready to go in the fridge. Bring eggs to a boil then set a timer for 5 minutes. When the timer goes off quickly rinse them in cold water. Peel, then cover with a mixture of 50/50 soy sauce and water with a splash of rice vinegar, then marinade in the fridge.