Cherish the rigorous job interviews

Three times in my career I’ve rejected job offers because I didn’t feel the interview process was rigorous enough.

Straight out of school, the company did not ask me any challenging interview questions. I walked away thinking: “They’re not going to challenge me. I’m not going to grow working here.”

Another company did not ask me any questions about what I wanted or why I was interviewing with them in the first place. I walked away thinking: “This place has no soul. They’re not going to care about building my career.”

Later in my career, every interview focused on my resume and not much else. I walked away thinking: “Everyone here must just get hired based on their resume.”

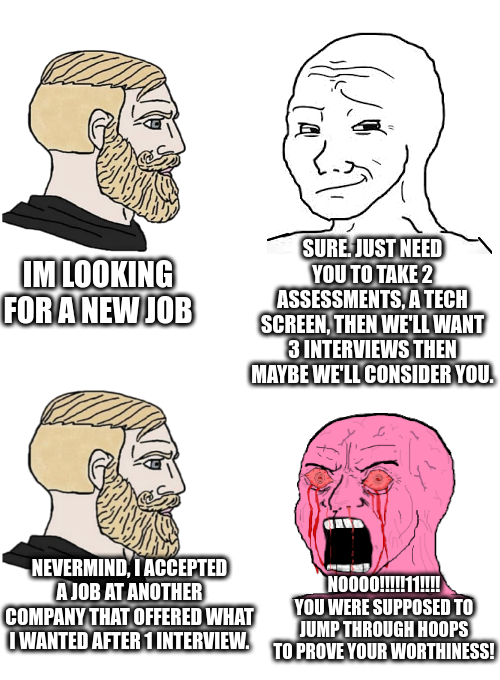
This meme (above) has been making the rounds lately on reddit, and while I appreciate the sentiment behind it, I personally could not imagine accepting a job offer somewhere after a single interview, especially if I didn’t know anyone at the company. The market for talent is growing more competitive every day, but as a candidate you should consider if the company is looking to just put a warm butt in their seat, or actually help build your career.

To employers, a rigorous interview process should convey to a candidate a commitment to excellence in both who you let into the organization and how people will be treated once they join.

To candidates, understand that rigor means the employer cares about mutual alignment and shared success, and not just jumping through arbitrary hoops as the meme suggests.

Originally posted on LinkedIn Pulse.

Three things I’ve come to believe about post modern C++

In no particular order:

  • Template metaprogramming is still evil, and C++11/14 hasn’t fixed anything about it. People argue metaprogramming enables “clean, elegant code,” as if a home built on a garbage dump won’t smell like garbage. If anyone else needs to repair or extend the foundation of your home they’ll need to parse through your garbage pile to make changes. Template metaprogramming as a rule should simply never be done outside low-level libraries.
  • auto is too easy to abuse. Oh but, “the IDE makes auto easier to read!” Go back to Java. auto does have a few good uses, clang-tidy provides excellent guidance on where its effective, its guidance should be followed.
  • Large lambdas harm readability. They make the control flow of the program harder to parse and discourage self documenting code. Lambdas should be limited to 2-3 statements. And please, if you write a lambda, mean it: don’t write a lambda where you could have just as easily written a standalone function.

Displaying a sequence of images in iPython Notebooks

You can rip a sequence of images into an mp4 and display it inline in an ipython notebook using a function like this:

import matplotlib.pyplot as plt
from matplotlib import animation
from IPython.display import display, HTML
def plot_movie_mp4(image_array):
dpi = 72.0
xpixels, ypixels = image_array[0].shape[0], image_array[0].shape[1]
fig = plt.figure(figsize=(ypixels/dpi, xpixels/dpi), dpi=dpi)
im = plt.figimage(image_array[0])
def animate(i):
im.set_array(image_array[i])
return (im,)
anim = animation.FuncAnimation(fig, animate, frames=len(image_array))
display(HTML(anim.to_html5_video()))

However there’s a disadvantage with this method: You have no control over the encoding settings so you’re likely to get a video with a lot of artifacts.

If you would like a video without artifacts, check out JSAnimation. This sends the sequence of images to the browser along with some javascript to play through them. This looks much better and is much easier to control than an html5 video control:

from JSAnimation import IPython_display
def plot_movie_js(image_array):
dpi = 72.0
xpixels, ypixels = image_array[0].shape[0], image_array[0].shape[1]
fig = plt.figure(figsize=(ypixels/dpi, xpixels/dpi), dpi=dpi)
im = plt.figimage(image_array[0])
def animate(i):
im.set_array(image_array[i])
return (im,)
anim = animation.FuncAnimation(fig, animate, frames=len(image_array))
display(IPython_display.display_animation(anim))

Compiling OpenCV 3.1 on Ubuntu 16.04

16.04 uses gcc 5.4 by default. You’ll need to install gcc 4.9 and configure OpenCV to use 4.9 instead:

sudo apt-get install g++-4.9
cmake -DCMAKE_C_COMPILER=/usr/bin/gcc-4.9 -DCMAKE_CXX_COMPILER=/usr/bin/g++-4.9 .

If you have CUDA installed you may want to disable compiling the CUDA libraries as well, or else suffer another hour+ of compilation time. Add -DWITH_CUDA=OFF to disable CUDA.

Installing the TensorFlow Docker image for GPUs on Ubuntu 16.04

The process is actually quite easy, but the installation docs don’t provide the right hints. I found some posts online suggesting others had battled with this, so I share this here in case others get tripped up as well.

1. Install Docker. Create a docker group, add yourself to it, then log out and back in. Verify you can run the “hello docker” sample as yourself.
2. Run the TensorFlow GPU image:
$ docker run -it -p 8888:8888 gcr.io/tensorflow/tensorflow:latest-gpu
3. Visit http://172.17.0.1:8888 and verify you can execute the “hello tensorflow” samples. These will run without the GPU–you’ll see errors on the console about not finding the CUDA libraries. Close the docker instance.
4. Install the latest nvidia binary display driver for your system. The simplest way to do this is through the Software & Updates GUI, Additional Drivers. Select “using NVIDIA binary driver,” apply changes and restart. You can verify you’re running the nvidia display driver by running nvidia-settings from the command line.
5. Install CUDA. On 16.04 the easiest way to do this is directly from apt:
$ sudo apt-get install nvidia-cuda-dev nvidia-cuda-toolkit
6. Install cuDNN v4. This needs to be installed manually. See instructions here. (You need to register for an nvidia developer account).
7. Run the TensorFlow GPU image, but this time give it access to the CUDA devices located at /dev/nvidia*. The easiest way to do this is with a script. The one the TensorFlow docs reference doesn’t work with 16.04, so use mine.
8. Visit http://172.17.0.1:8888 again. This time when you run the samples you shouldn’t see any CUDA errors.

On the Art of Debugging Software

Excerpt from Mager, Troubleshooting the Troubleshooting Course, 1982:

A 1979 study by Cutler (Problem Solving in Clinical Medicine) made an observation about the importance of probability information by offering three maxims for diagnosticians:

  • Common diseases occur commonly.
  • Uncommon manifestations of common diseases are more common that common manifestations of uncommon diseases.
  • No disease is rare to the person who has it.
It is interesting to translate these maxims into the language of equipment and troubleshooting. They come out this way:

  • Common troubles occur frequently.
  • Unusual symptoms of common troubles occur more often than common symptoms of uncommon troubles.
  • No trouble is rare to the client who has it.
Mager’s book is mostly about equipment troubleshooting. More specifically, training courses on troubleshooting, their flaws, and how to fix them. The anecdotes in the book deal with the diagnosis of appliances, manufacturing equipment, radars, etc., but I was delighted by how relevant they are to diagnosing issues in software.
Most software engineers have a crazy bug story or two (or twenty) but it’s rarely a true “crazy bug.” It’s usually a typical bug like a race condition, off-by-one, uninitialized variable, memory leak, misinterpreted API, etc. that manifested itself in an extremely odd way.
Updating Cutler and Mager:
Uncommon behavior resulting from common software defects occur more often than common behavior of uncommon software defects.


Embedding images in HTML email for Outlook

#!/bin/sh
echo "Content-Type: multipart/related; boundary=\"boundary-example\"; type=\"text/html\""
echo
echo "--boundary-example"
echo "Content-Type: text/html"
echo
echo "<h1>Email</h1>"
echo "<img src=\"cid:image.png\" alt=\"image\">"
echo
echo "--boundary-example"
echo "Content-Location: CID:something"
echo "Content-ID: <image.png>"
echo "Content-Type: image/png"
echo "Content-Transfer-Encoding: BASE64"
echo
base64 /tmp/image.png
echo "--boundary-example--"
./email.sh | sendmail some@emailaddress.com

Linux 32bit PAE kernel with more than 8 cores

It’s not entirely obvious how to do this, but it can be done if you compile your own kernel. The trick is enabling BIGSMP before you select the number of CPUs.  If you don’t, you’ll get an error saying more than 8 cores is an invalid option.

Kernel compilation instructions for Ubuntu are here: https://help.ubuntu.com/community/Kernel/Compile

When it comes time to set kernel configuration parameters, make sure to select:

CONFIG_X86_PAE=y
CONFIG_X86_32_SMP=y
CONFIG_X86_BIGSMP=y
CONFIG_NR_CPUS=32

Enabling CTRL-ALT-DEL in Windows 7 over Synergy

I have a Linux machine running as my Synergy server and a Windows 7 machine as a client.  With the default Windows settings you can not enter a CTRL-ALT-DEL SAS (Secure Attention Sequence) over Synergy on the Windows lock screen. This can be frustrating if you lock your computer frequently or login remotely.

You can allow this behavior by allowing “services” to issue the SAS in the Windows Logon Options.  These are found in the Local Group Policy Editor.

  1. Go to the Local Group Policy Editor (Type “gpedit.msc” in the run menu)
  2. Dig down to Computer Configuration -> Administrative Templates -> Windows Components -> Windows Logon Options
  3. Open up the “Disable or enable software Secure Attention Sequence” option
  4. Set it to “Enabled” and then select “Services and Ease of Access applications” below, click OK

You should now be able to issue a CTRL-ALT-DEL to Windows 7 over Synergy while on the lock screen. Note: Sometimes the CTRL and ALT keys stick, just press them each once to un-stick them.